I only have two weeks to do this cosplay. Ciri is one of the female characters presented in Witcher 3 – Wild Hunt and after Yennefer, the second on my wishlist. So far, I buyed some shoes, checked the make-up, found material to do the belt and draw the pattern. The other components are on their way, so I hope to receive them in the next days.
13 days to go
Today I started the belt. First of all, I designed the various parts on the PC and printed them out. By the way, I used this kind of materials available in Germany.

In addition, I needed some tools I could find in the kitchen:
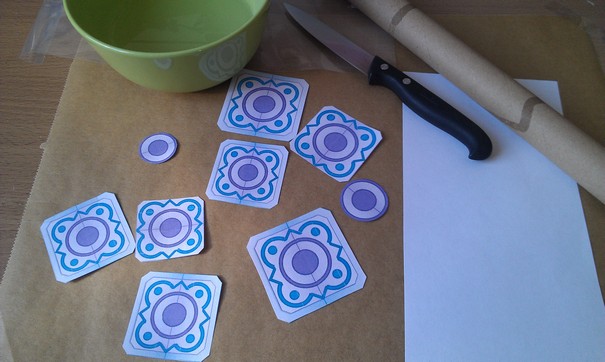
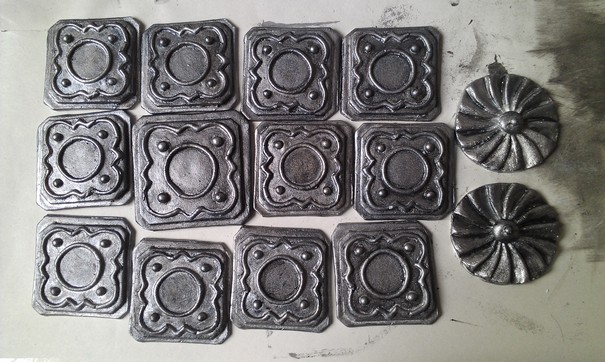
All I know about this technique is based on some YouTube Videos. Someone on Facebook said it would work for Ciris belt as well, so I decided to try it out. My plan is to make a model, then create a profile for 12 pieces in total. I had to use various kinds of materials to achieve the right look, including something similar to clay, leather, adhesive tape, hot glue and pearls in two sizes.
Furthermore, I decided to do the knoble of her dagger. All three looked like this:
12 days to go
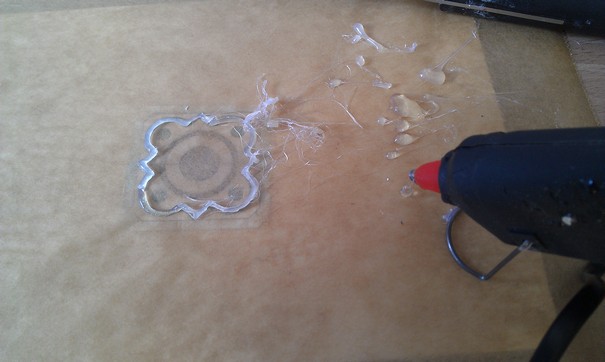
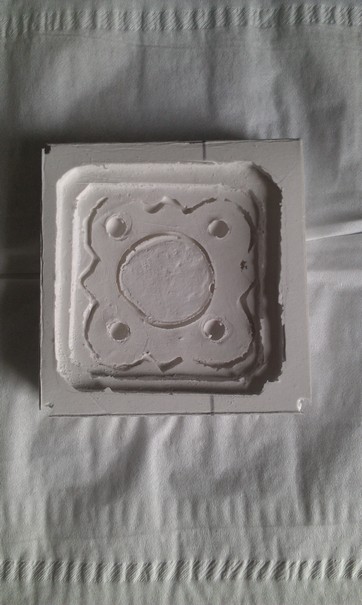
Yesterday evening I created the paper figure and put the model inside in ordert o fill it with silicone.
The next morning everything was ready to be taken apart. Unfortunately, the model was destroyed. The silicon still needs some improvement.
11 days to go
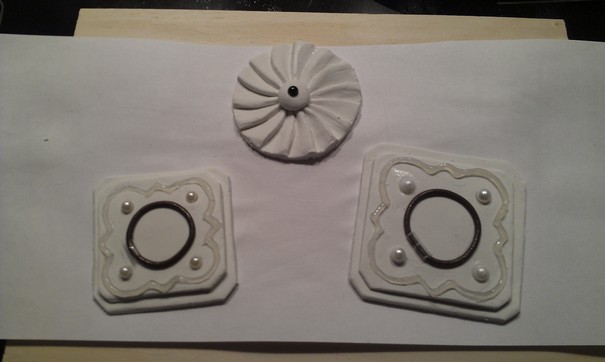
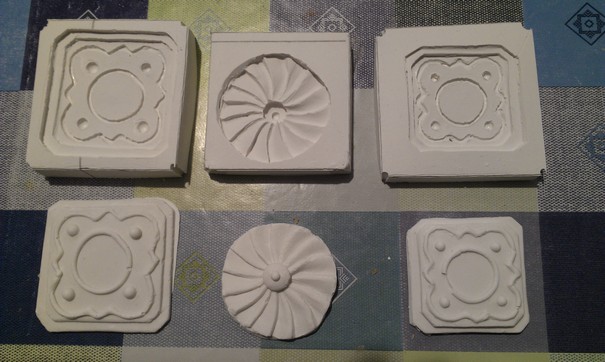
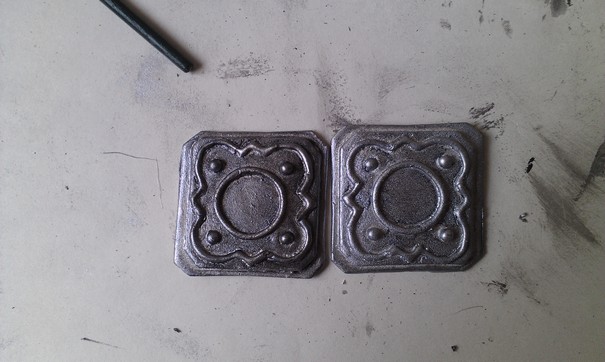
Although I do not have a bunch of news to share, I want to show you a quick photo of the first models I did today. With the help of a scissor, I could alter the silicone profile. There are still some errors due to some air bubbles.
10 days to go
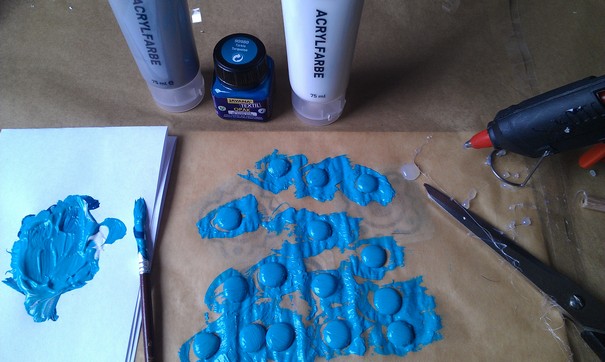
Since my fabric did not arrive today, I had to focus on the belt again. Therefore, I created the blue stones with the help of hot glue and acrylic paint. (I had to add some blue fabric paint, because I did not have this color.)
While I made more belt elements, I also started with the sord and dagger. To be honest I will only make the upper part of them, because I am not allowed to take a real sword to a convention.
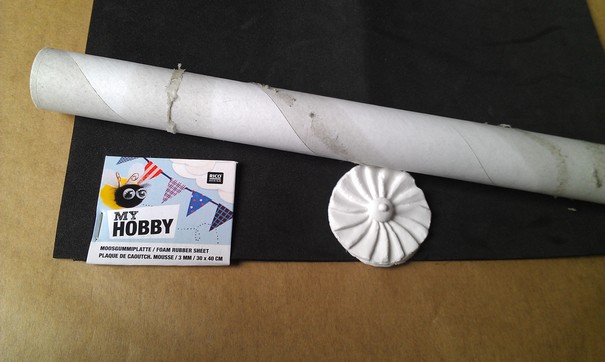
On this photo you can see the basic materials for the crafting process: foam, paper rolls, and paper mache. The paper roll is in the center, covered by tape and paper mache. However, the thicker parts are formed by the foam and only covered in paper mache.
I could already start parts of the sword, too. Foam is covered with Worblas Finest Art, a plastic plate that can be altered using heat.
9 days to go
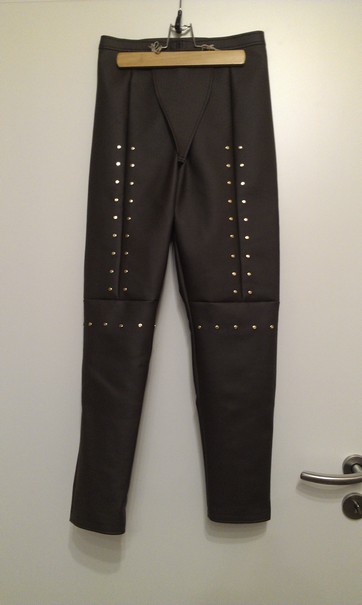
Finally I received the materials I was waiting for all the time. Immediately I started sewing the trousers. The golden spots on the brown faux leather are 48 rivets. Altough the trousers are not finished, I want to show you a photo of the details:

By the way, I could achieve some process on Ciri’s sword. The haft is covered with hand-sewn leather now. After this step, I added some Worbla.
8 days to go
Although I did want to finish the trousers today, there is still some work to do. However, I could apply the first layer of color to the belt parts. It is too shiny now.
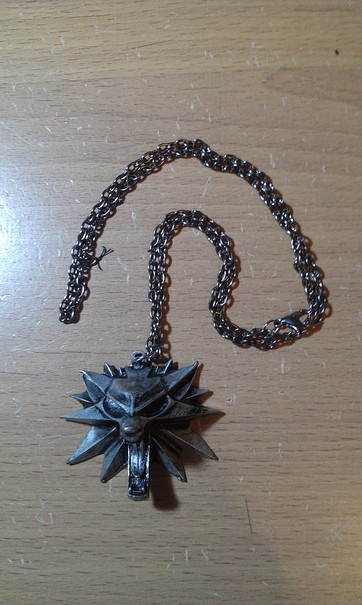
In addition, my Witcher medaillon arrived today, that I purchased on eBay. In the first part of the game, Ciri only wears a necklace of the Cat School, but later, she has one with the wolf symbol, too.
7 days to go (appendix)
I could not work on the cosplay today.
6 days to go (appendix)
The trousers are nearly finished now. I will show some photos soon.
5 days to go
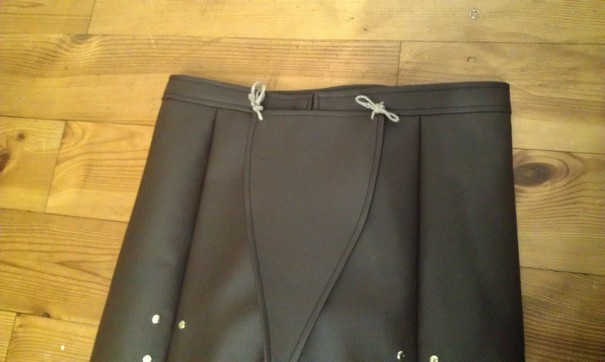
The trousers are done. They are made of brown fake leather and not very stretchy. Therfore, I had to change the pattern (I already made using my own measurements) several times. In the end, the waist is about one inch smaller than my original measurement in ordert o fit under the corset.
The trousers are closed with 7 pairs of hooks and eyes. Both sides meet each other in the middle.

This construction is hidden under a part formed like a V, that is a part of the original outfit from the PC game. I used some embroidery thread to create the strings.
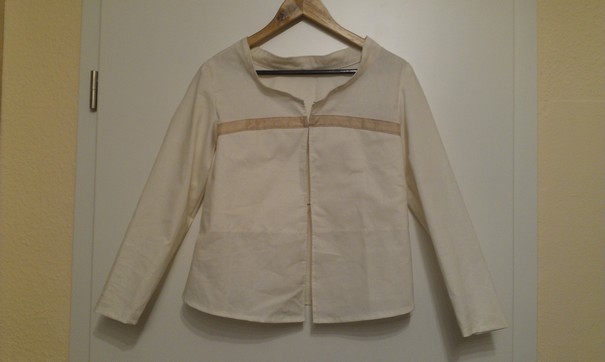
In addition, I could sew the shirt completely. It does lack any darts. The sleeves are long. Furthermore, the neckline is very wide as if Ciri wears a shirt of Geralt that is too big for her. The front is only closed with two pairs of hooks and eyes, so that it shows some skin here, too. Since the fabric, a cotton creme material, is very thin, I added a second layer where the bust will be. The lower seam will be hidden under the corset, while the upper one cannot be seen due to the piece of taffetta sewn to the shirt. Furthermore, you can see a small collar.
4 days to go
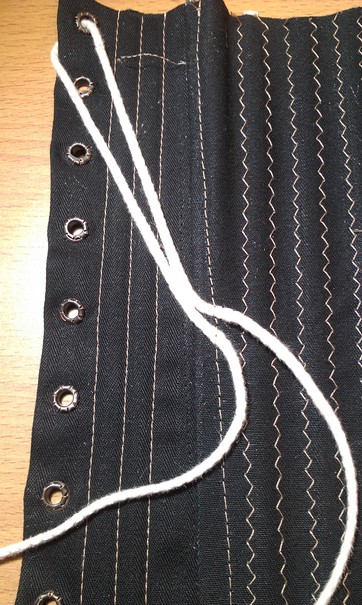
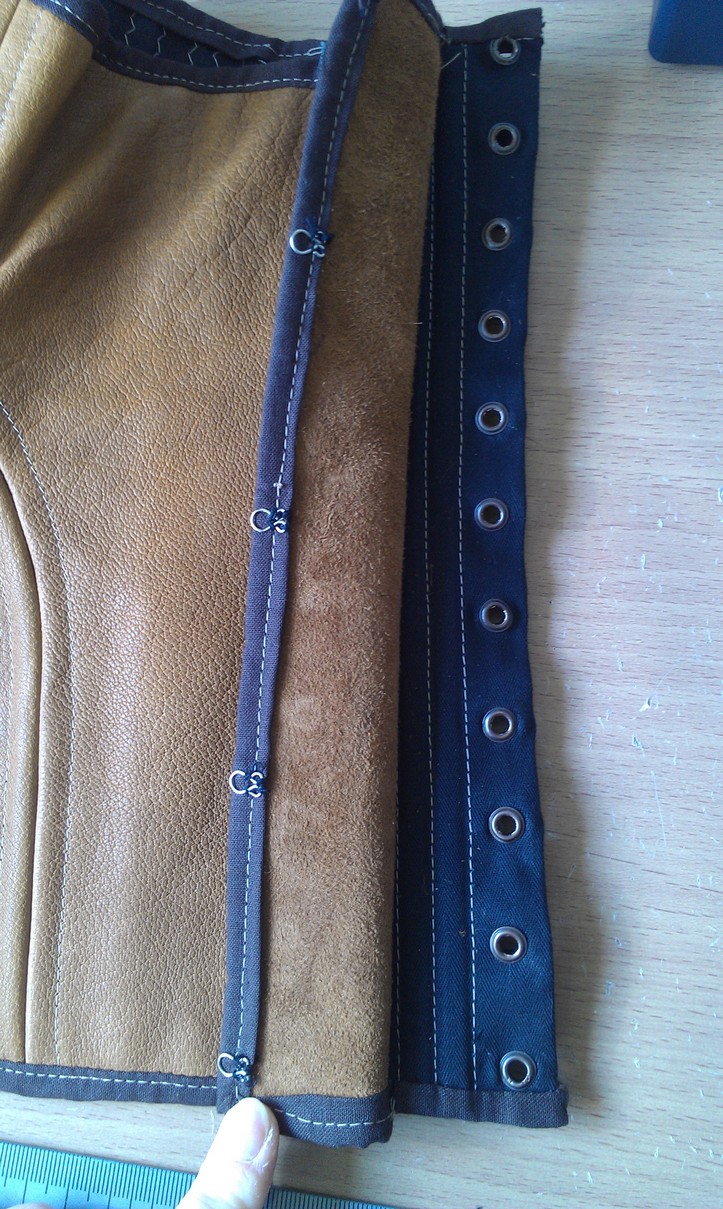
I could not achieve as much as I expected in the few days, so that I am in a hurry now. However, I could only sew the lining of the leather corset instead of the whole garment. It did not fit well during the first fitting, so I decided to finish it another day. You can see the eyelets on the photos, as well as a funny mistake I made.
3 days to go
After a fitting process of about four hours the corset fits very well – or let’s say the lining, because an upper layer is still missing.

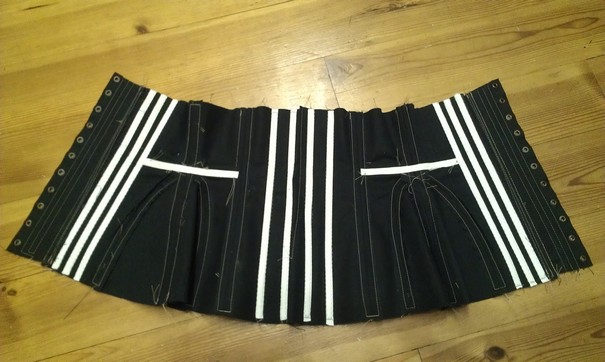
It is made of black coutil, a very strong fabric that I ordered in the UK. Furthermore, 22 cable ties are inserted instead of real steel, because the latter ist o thick. In addition, I often use cable ties for my historical costumes.
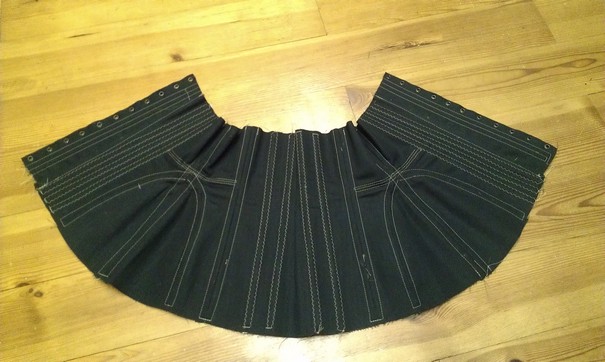
Some are inserted into the seam allowances, but some are between the coutil and white tape. I also added some tape to the parts that are put under tension.
2 days to go
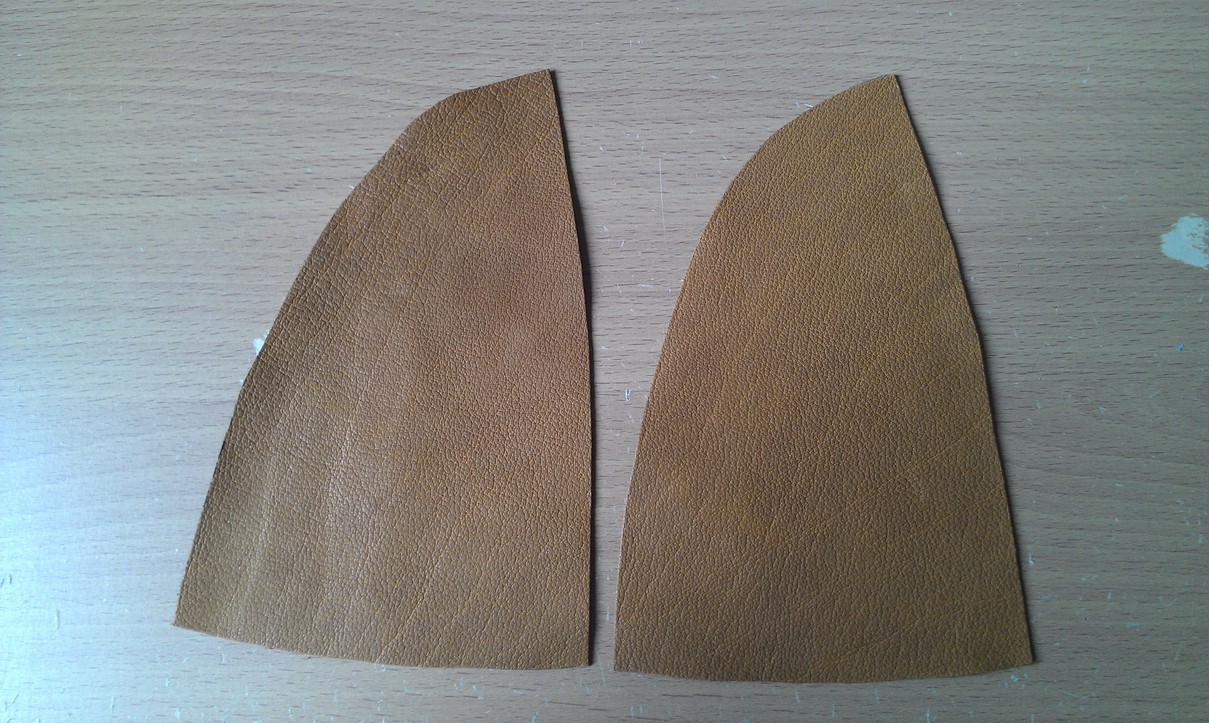
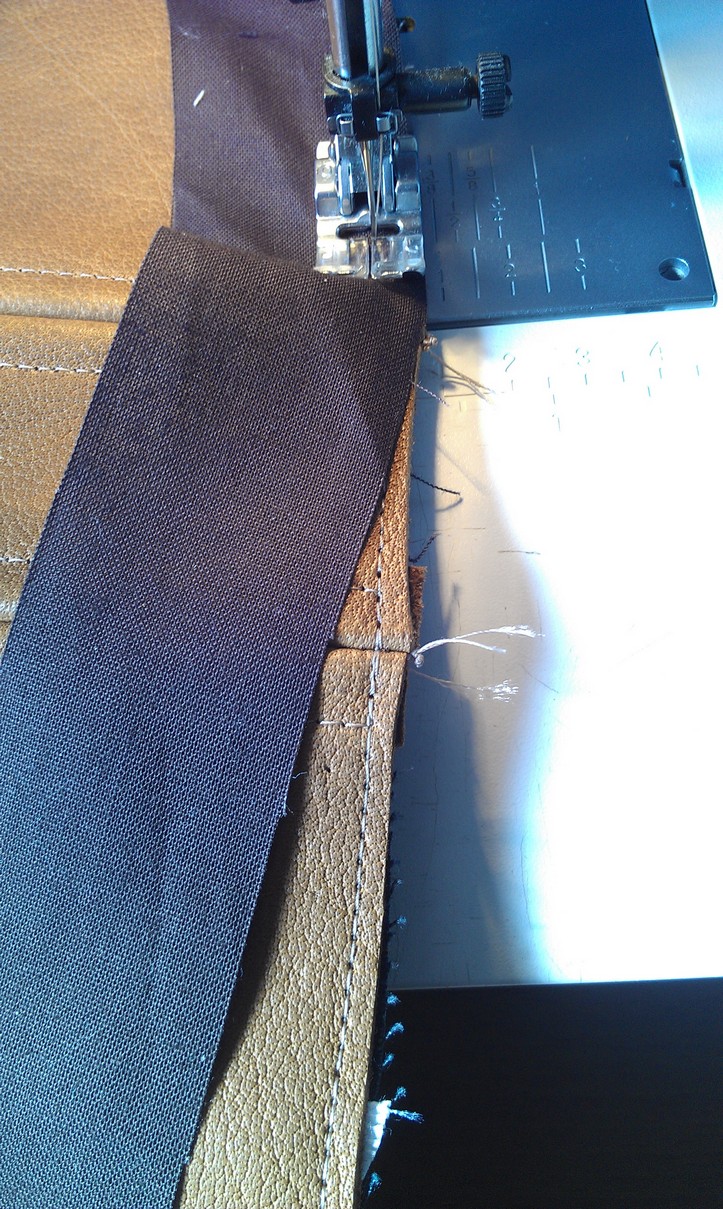
Today I managed to do the leather part of the corset. First of all, I had to cut the pieces. I could use the same pattern as for the lining. You can see the individual parts of half of the corset on the photo.

By the way, I made a small mistake: I forgot to turn the pattern of the hip dart, so that I had the same piece two times.
1 day to go
When looking back at the last two days, I want to sum up the things I could finish: Bopth layers are sewn together at the upper and lower edges. In addition, the vertical seam in the middle lock them into position. I finished the fringes with brown cotton tapes. First of all, I sewed it directly unto the corset…
…then turned the tape and made a second, decorative seam.

On the next photo you can see that the front of the corsets is separated: The lining has some yelets with a lacing, with which I can alter the shape of my body. Then, the leather is closed with five pairs of hooks and eyes, so that you cannot see the lacing, but only a smooth front.
Party! Conclusion
As I already mentioned, I had to work on the corset today, too. It was finished two hours before the party. I only have one photo of low quality to show.

To sum it up, I managed to finish the most important parts:
- Corset
- Trousers
- Shirt
- (Make-up and scar)
- Buyed the medaillon
However, I would have liked to wear the following, too:
- metal belt
- hairstyle
For further events, I have to work on:
- shoes
- gloves
- leather bracelets
- leather belt with pouch
- sword plus sheath
- dagger plus sheath
I will continue the project and write some updates here, too.
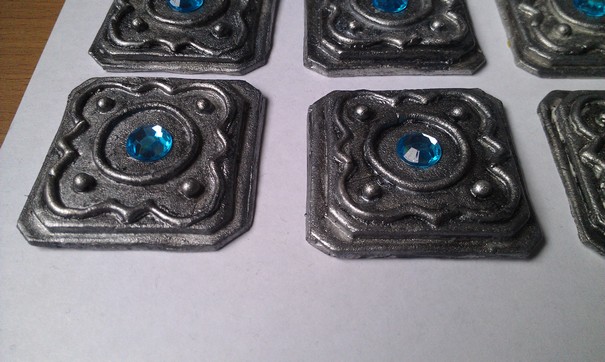
I continued to make the belt. As I already showed above, the first layer of color was a silver spray paint. Afterwards, I added black spots, that you can see on the photo.

In the next step, lighter silver color was added with a sponge, which you can see on the right. Afterwards, it was to bright, so I apllied a layer of darker gray, that was mixed of black and silver acrylic paint and afterwards washed off a little bit. You can see the result on the left. I am very happy about how it turned out.
Today I started the leather bracelets. They are made of leftover pieces fromm y first armor. Since the buckles were very shiny, I did sand them a little bit.

You can see the finished parts here:
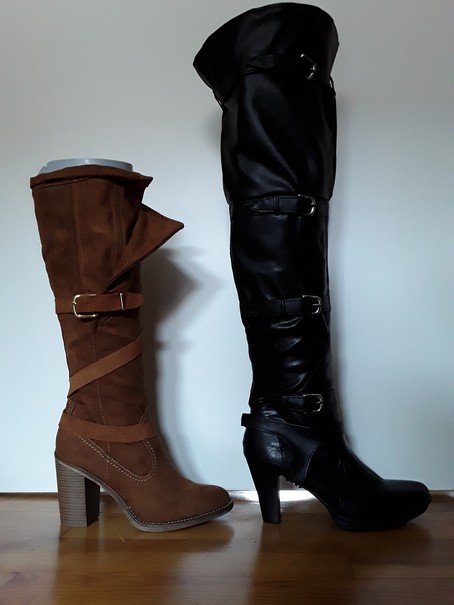
As I already mentioned in the Yennefer WIP, I buyed two pairs of shoes when they were on sale and planned to alter them.
First of all, I removed the upper part of the boots. As a result, I could use the pieces for the new parts.

Furthermore, I had to widen the show by inserting some leather. This had to be done irrespective of my measurements, because Ciri’s boots overlap in the front.
However, the part turned out to be too small, so that I had to add another part. In the next step, the upper part was sewn to the boots.

When it came to the leather straps, I finally went out of material, so that I had to cut two strips of the corset leather to use for the shoes.
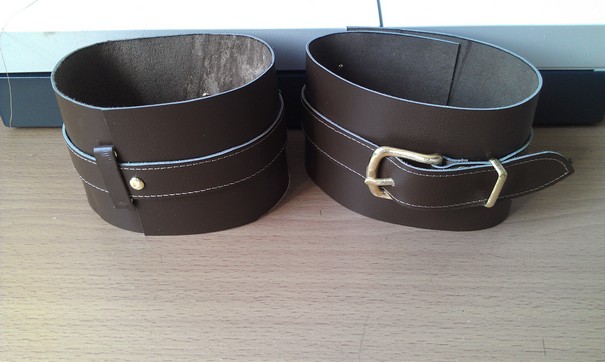
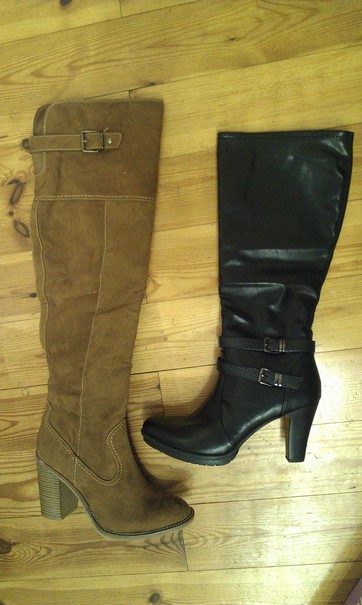
By the way, the buckle is only for decoration, because the closing consists of three hooks. Here you can see the boots for both the Yennefer and the Ciri project.
After the eight metal rivets were added, the corset is finally finished.

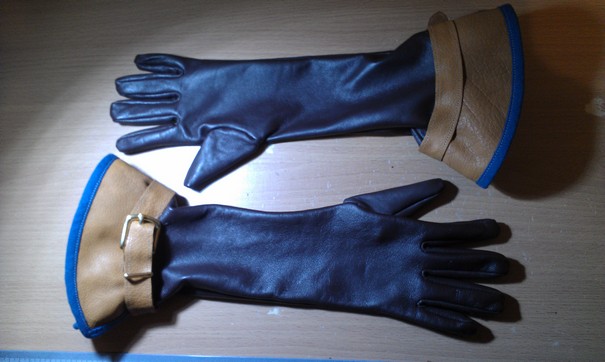
Since I already created the pattern for the Yennefer project, I could start sewing the gloves. They are made of thin leather for the main part and the corset leather for the upper part. Two stripes of fabric with buckles are also added, as well as some blue fabric.
Besides I could make progress with the belt. The color is now sealed with nail polished, which took two small bottles. Afterwards, the small rhinestones were glued to each part.
Since there could be some space between the individual parts, I decided to use the same leather for the basic belt I already buyed for the corset. First of all, small leather pieces were added to the basic belt with the help of rivets. Afterwards, the „metal“ parts were glued to the small pieces. As a consequence, I can remove a part in case it is broken.
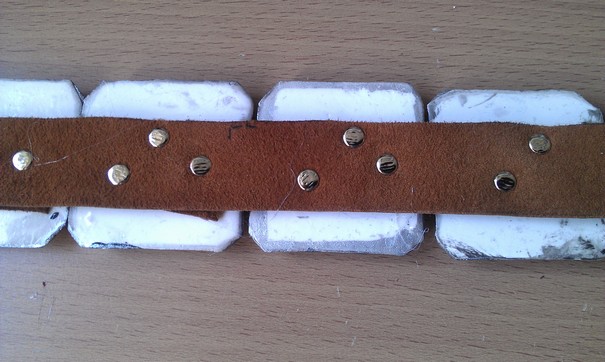
When trying it on, I realized that there was too much space between the parts.
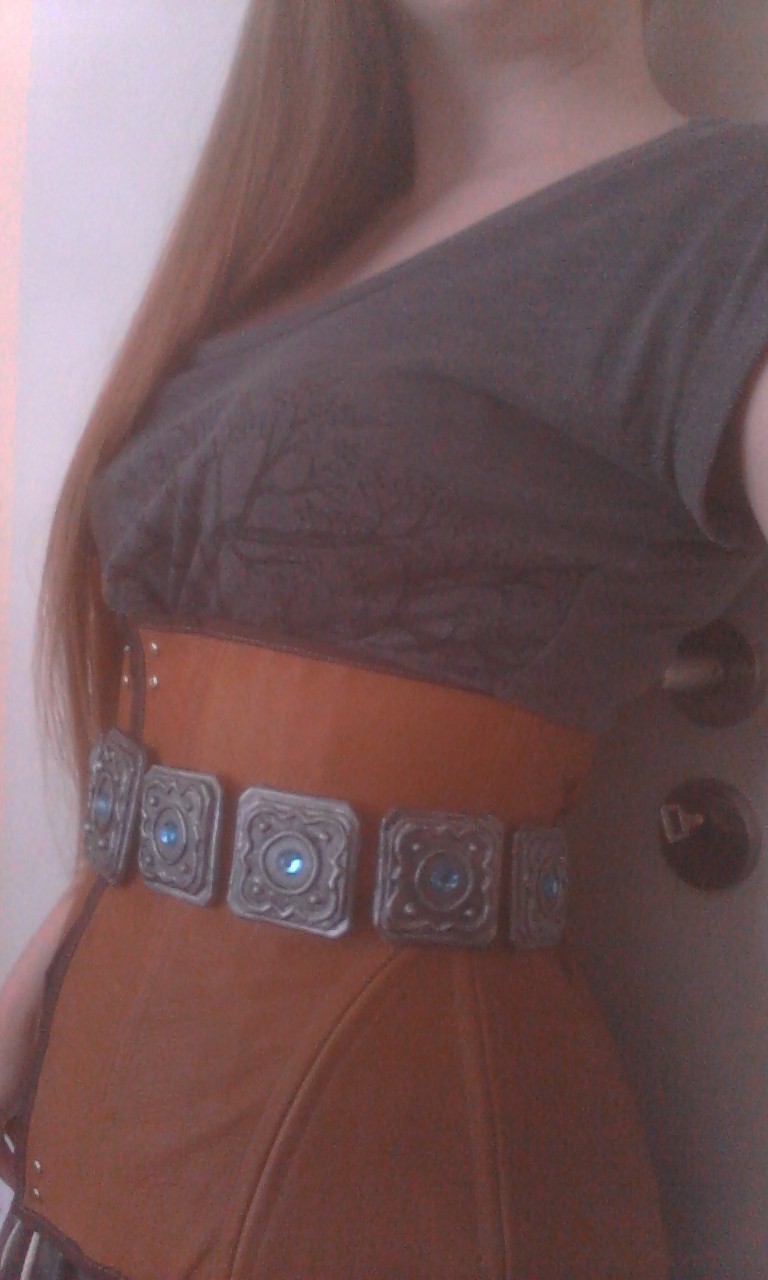
Therefore, I decided to make another small piece and insert it, so that they are very close to each other. In addition, I want to glue a tape to the leather so that it is less stretchy.

It is closed with a small piece of leather.
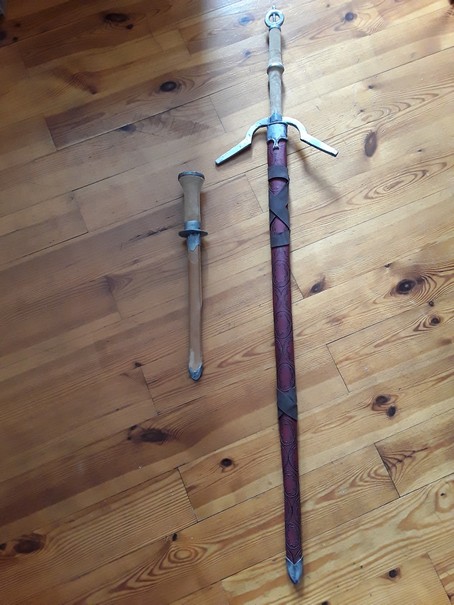
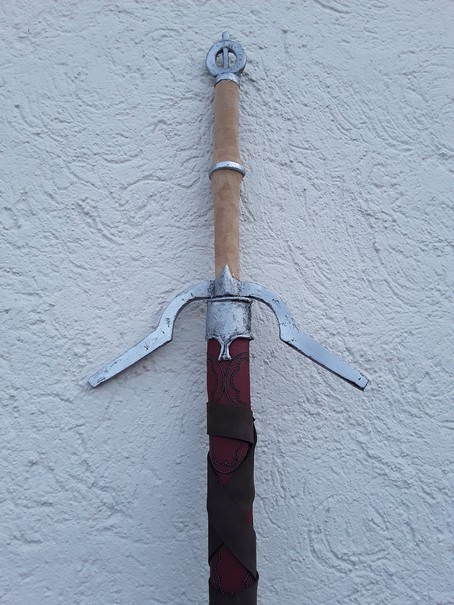
It was time to finish Ciri’s sword and dagger. As I already mentioned above, the basic material was thick cardboard. To achieve the right shape, I added material similar to clay and some rubber. Then I covered everything in leather and glued the other pieces made of Worbla to the main part. In order to be allowed to take both of them to Conventions in Germany, I could not do anything similar to blades, so I simply left this part away and only created the sheaths.
This was pretty simple on the dagger, because I could use cardboard, covered everything in leather and added the ending made of Worbla. In addition, I created the upper part of the handle as follows: First of all, I made a model of clay. Afterwards, a silicon profile was crafted. To sum it up, I used the same techniques as described in the sections dealing with the belt.
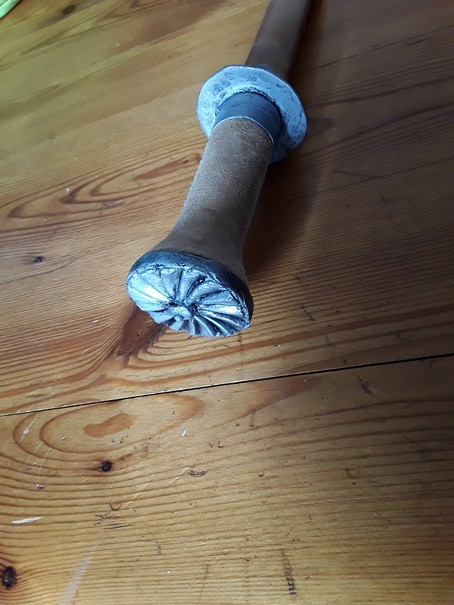
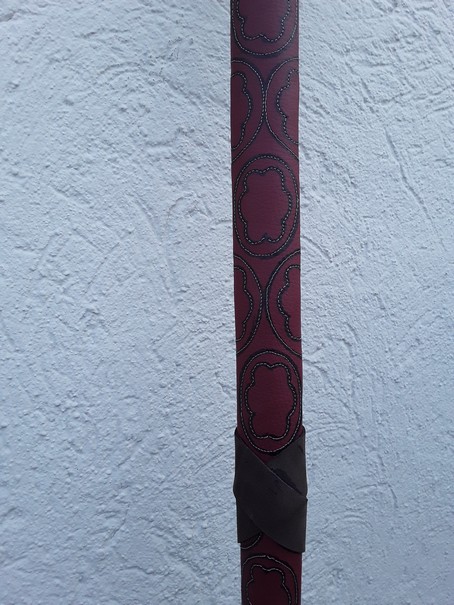
Due to the length and weight of the sword, I had to use wood for this one that was covered with foam. Afterwards, I created the sheath by drawing black lines and sewing the complex pattern by machine. Again, some Worbla was glued to the main structure.
It was rather difficult to achieve the right silver color. The main problem turned out to be the surface of the Worbla. I tried various things including grinding. In the end, three layers of acrylic color were apllied, as well as two layers of semi gloss finish.
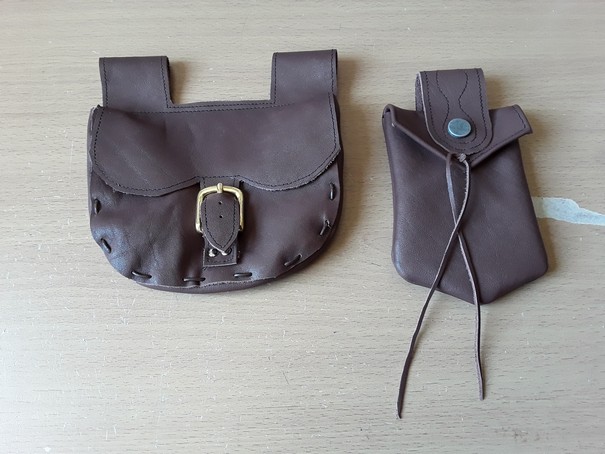
There are two pouches on the belt in a brownish-red color. They are made of leather. While the bigger one is functional, the small pouch is for decoration only.
After a lot of research, I decided to buy a lace-front wig. Although it turned out to be a little bit too dark, I really like it. You can see the unstyled and altered version in a direct comparison on the next photo.

In addition, I realized that I did forget to make the leather belt Ciri wears. To achieve the exact pattern, I used some kind of a carving tool and a Dremel.
