The easiest way to craft Thor’s Hammer is by cutting out the following pattern on 3mm thick cardboard. This combines the advantages of low material costs and the use of simple tools. In addition, the prop is not too heavy. You will need a cutter, a hot glue gun with plenty of glue, some adhesive tape, eva foam (or something similar from the crafting store), the cardboard tube of a roll of aluminum foil, a strip of leather and different shades of acrylic paint with appropriate brushes and an optional primer. Contact glue could come in handy as well, as well as some EVA clay.
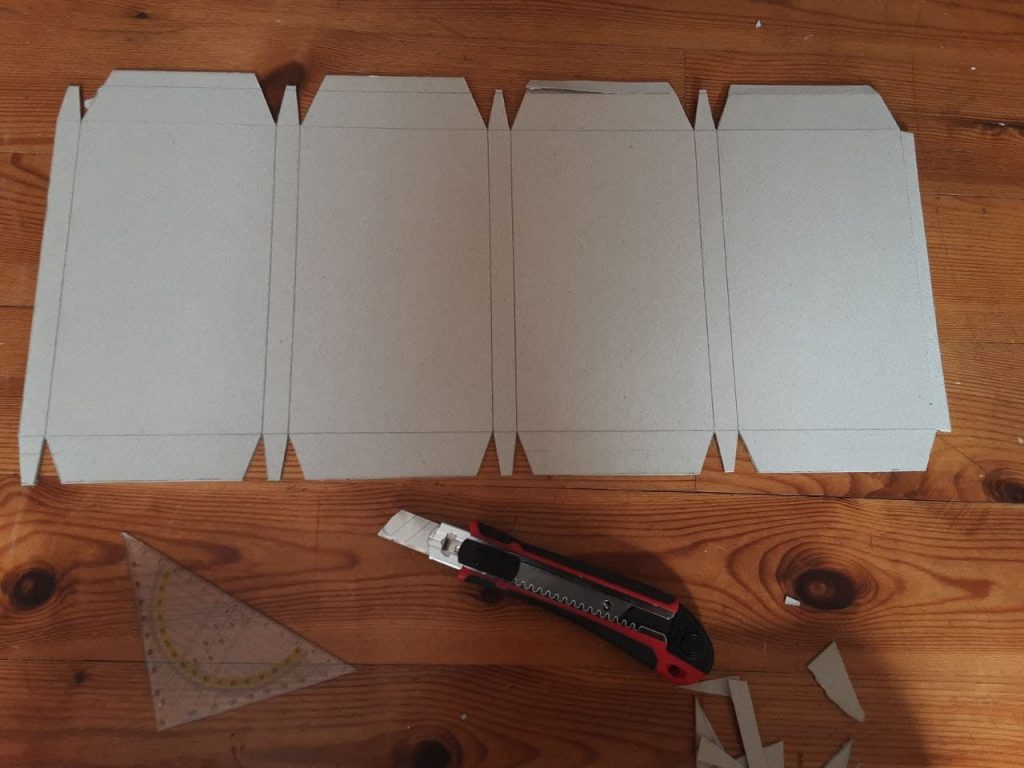
First of all, you have to cut out the following pieces. You should use a cutter and 3mm cardboard. Be careful not to cut yourself since the cutter has to be very sharp.
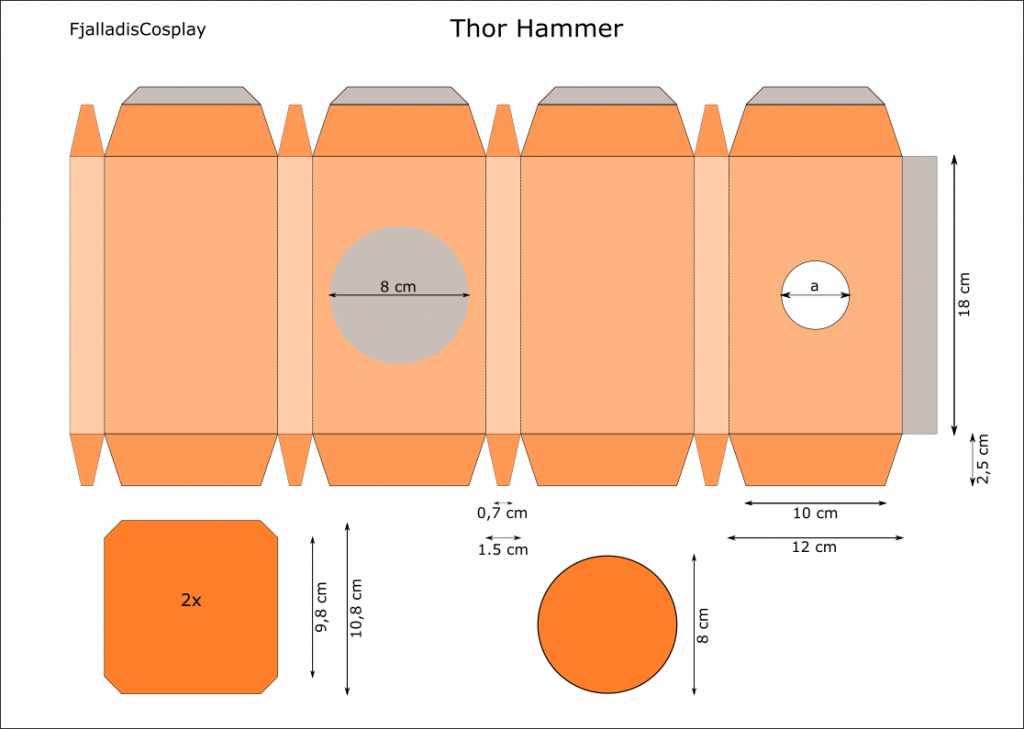
The grey areas are meant to create an additional overlapping area, which will be glued to the second side piece. This is less complicated than it sounds, you will see. At the moment, you only need to know that you can remove some layers of paper there for easier handling, if you want to.
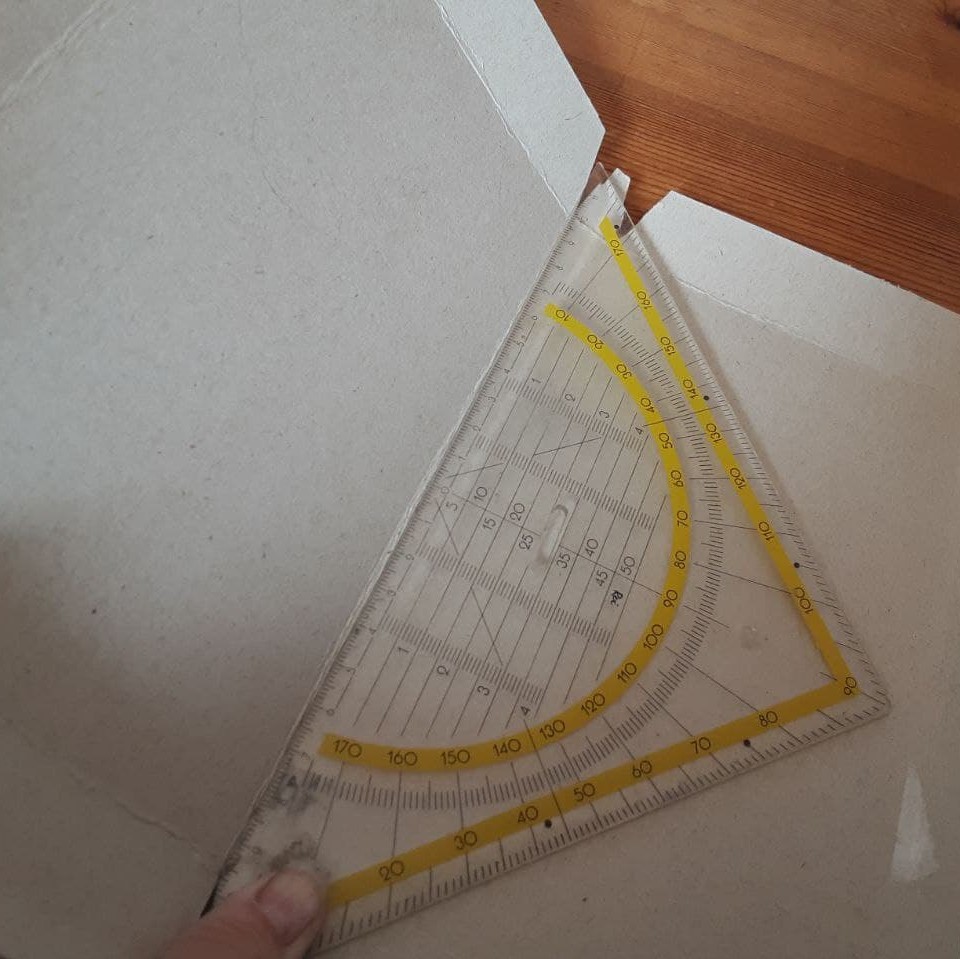
In the next step, you also cut the inner lines of the pattern, but only to a maximum of 1/2 of the thickness. These cuts have to be on the outside of the material and helps to bend the cardboard in the next step. Don’t forget to cut out the hole (a) with the diameter of your future handle. This can be tricky with a cutter. You can glue on the large circular shape any time from now on until the painting process starts.
Afterwards, you glue the long edges to each other, creating a tube without lid and bottom. To continue, it is helpful to secure the small edges with some adhesive tape.
Now it is time to heat up the hot glue gun. You will need plenty of glue sticks, as you can see in the following pictures. Be careful to only close one side of the hammer, because you need to reach into it for securing the handle. As I mentioned above, the tube of aluminum foil is very durable and works fine. But you have to create some additional surface for the glue. I did this by stacking eva foam. Contact glue works fine with the foam.
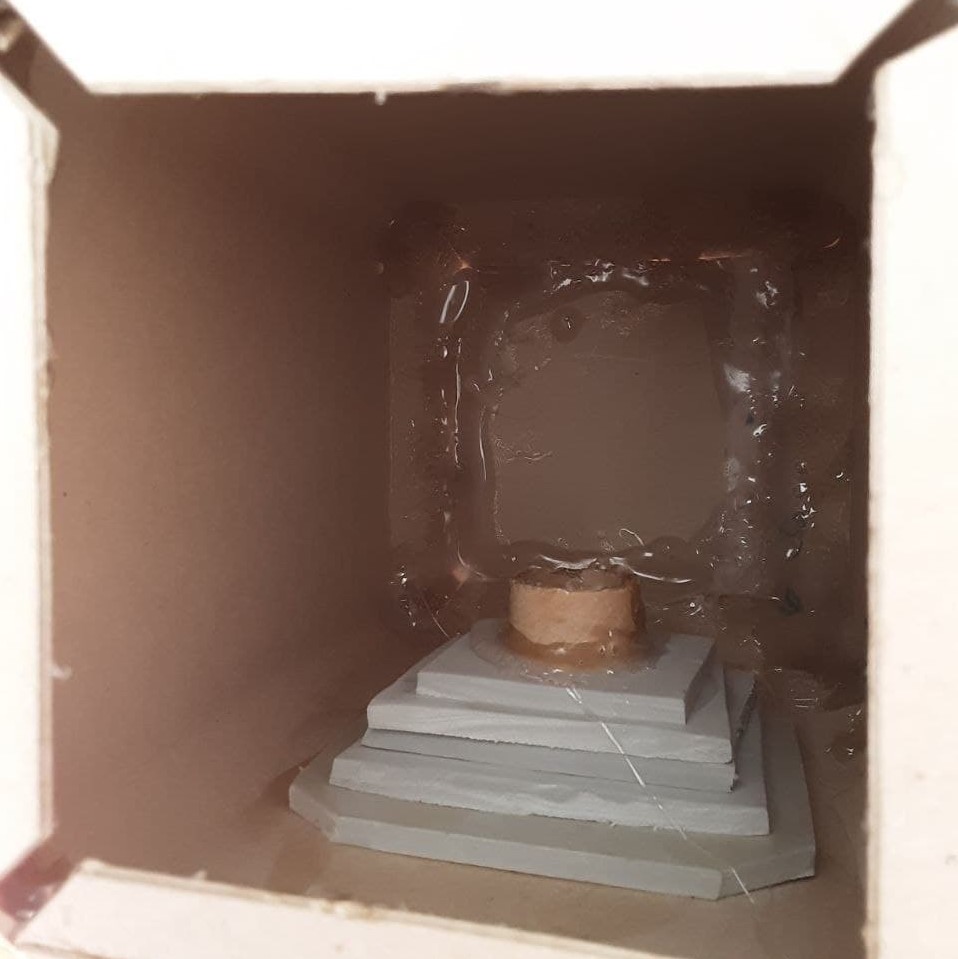
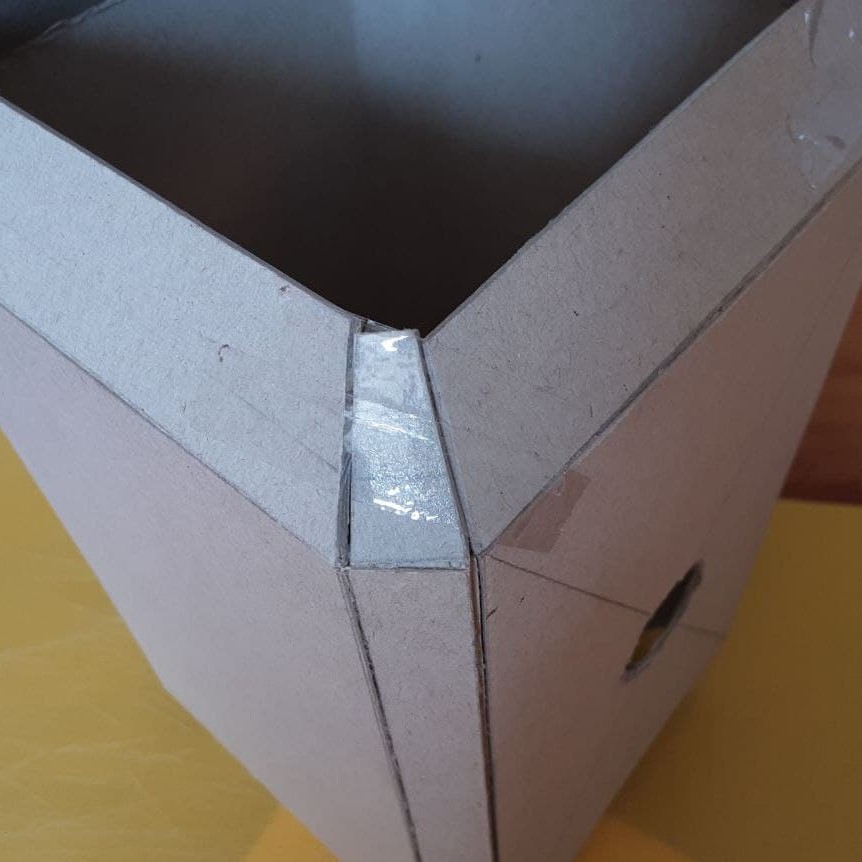
At this point you may have realized that the second side piece of the hammer cannot be glued to the main piece in the same way. This is the reason i added the grey areas. The are bend in position and treated with contact glue. of course you have to brush on some glue to the side piece as well. Then press them to each other.
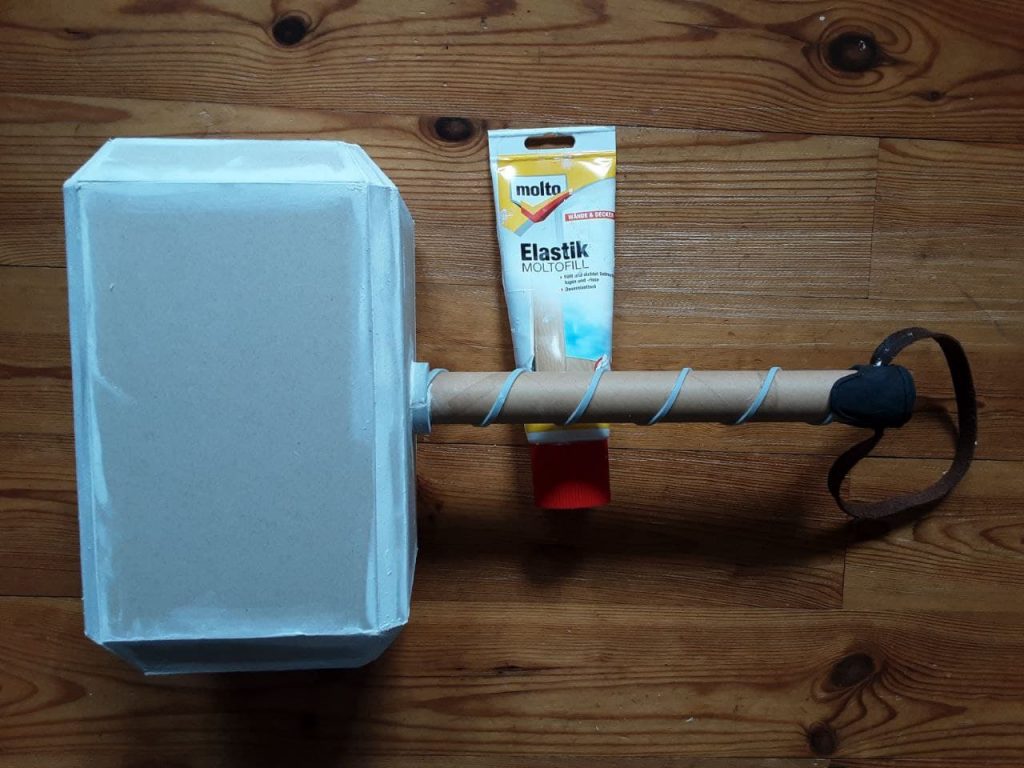
Since the outside of the cardboard was cut, the edges may not be that pretty. You can fix that with some filler, but that’s optional. The photo also gives a hint to some of the next steps: EVA foam should be added to create the decoration on the handle. In contrast to these grey pieces, the black one is more difficult and cannot simply be glued on, because it contains the leather strip. In order to create a durable link, I punched two holes into the tube, draw the leather through the holes and added a knot. Next, you can add the mysterious black material. It is EVA clay, but I guess something similar from the crafting store will work as well. I heard that fimo can be formed like clay, but I don’t know anything about sealing it.
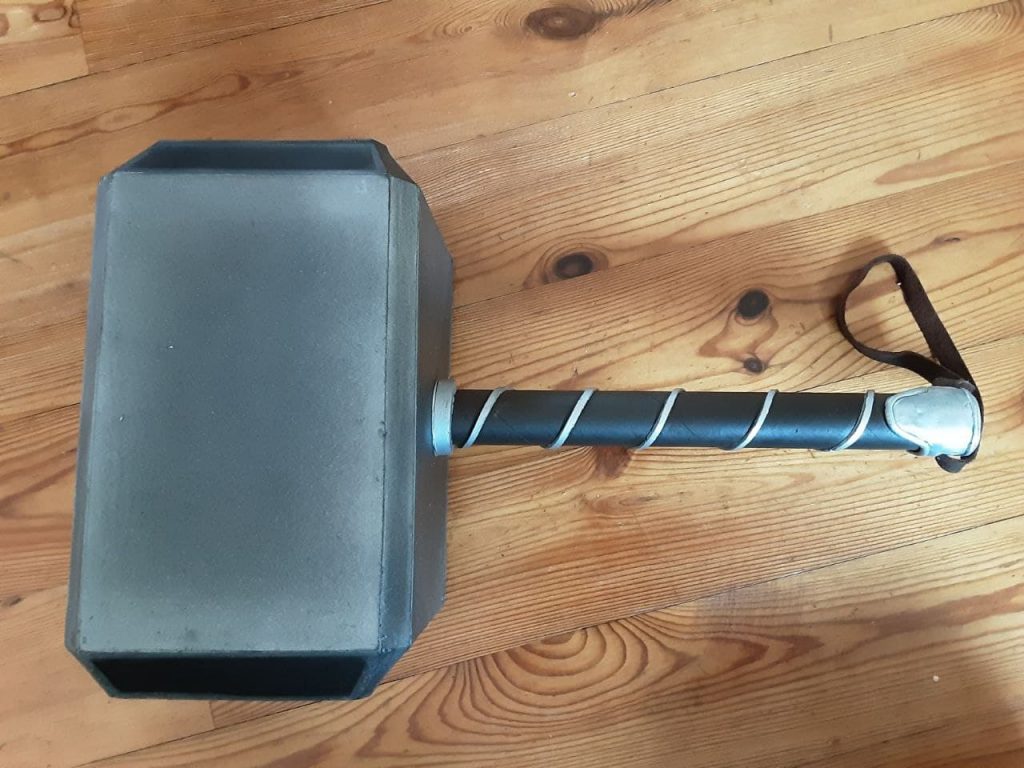
Speaking of which, I sealed the surface with a spray primer. I am not sure if this is a must-have, but it may prevent the paint to soak into the cardboard. This is were the fun begins: Use your acrylic paint and some brushes to bring Thor’s hammer to life. An airbrush comes in handy as well.
To sum it up, this prop is a great project for beginners, because you don’t need any advanced tools. The material is rather cheap and can be replaced easily if your first attempt fails (mine did, it was simply too big).
As soon as the complete cosplay is finished, I will link it here.
In the meantime, check out the other tutorials and making-of pages.