I already mentioned some methods of making the Wonder Woman armour on the cosplay’s main page, so check it out first. This page is meant to show the details of the techniques, including some photos. First of all, I had to create a proper base on which the armozr itself could be attached, so that there is no tension on the thin foam. Therefore, I used one of my underbust corset patterns and added the top area, which you can see on the photo. Since I have an (nealy) exact copy of my torso made of duct tape, I did not have to wrap myself in pattern tissue.
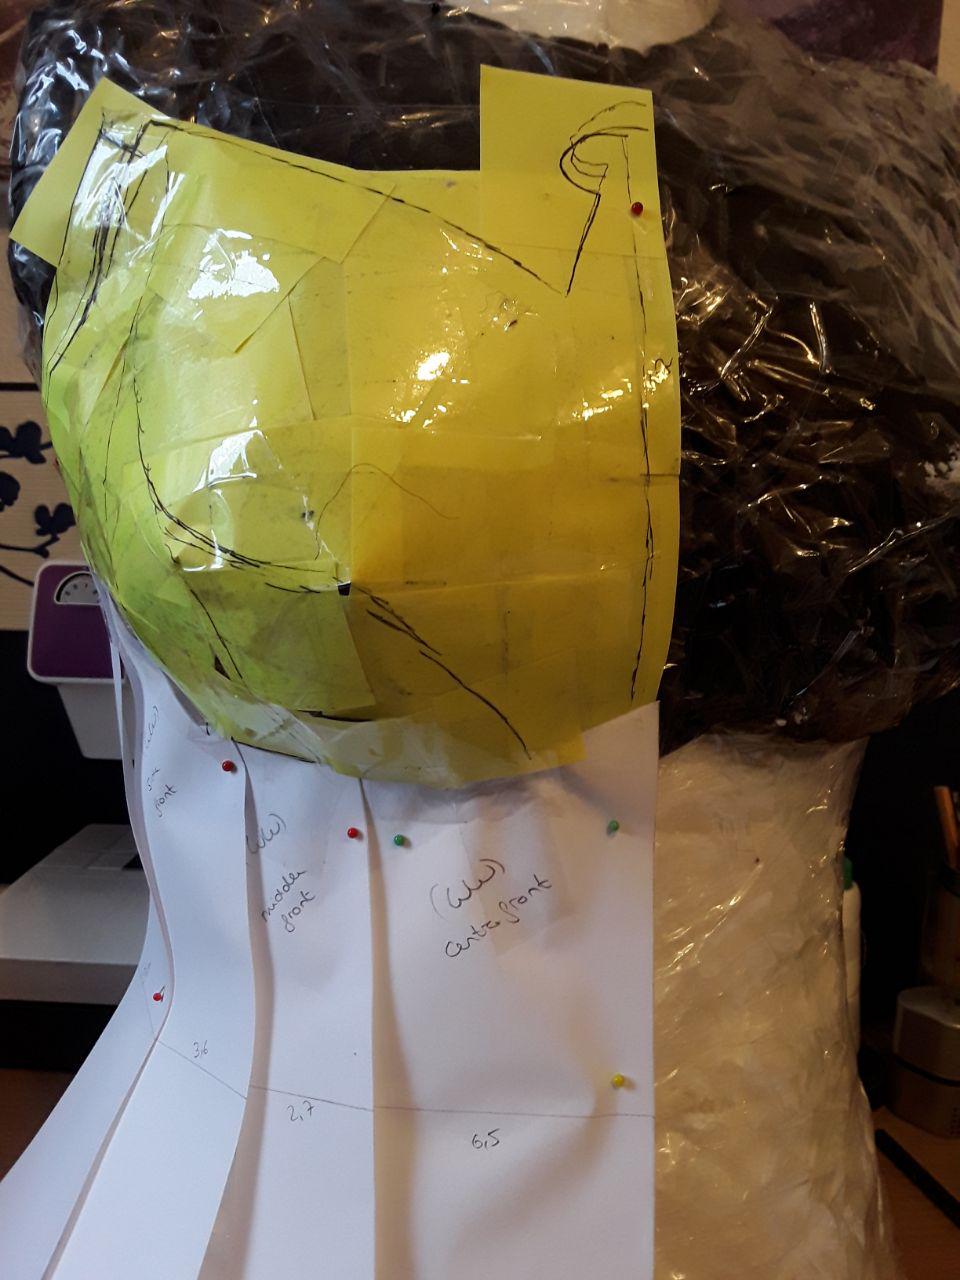
The marking were transfered to create a pattern. I used a special fabric named Coutil for the corset. On top of this, the shape of the armour could be destinguished. Some time later I found out that they used a similar method, which you can read about in the book “Wonder Woman – The Art and Making of the Film” by Sharon Gosling.

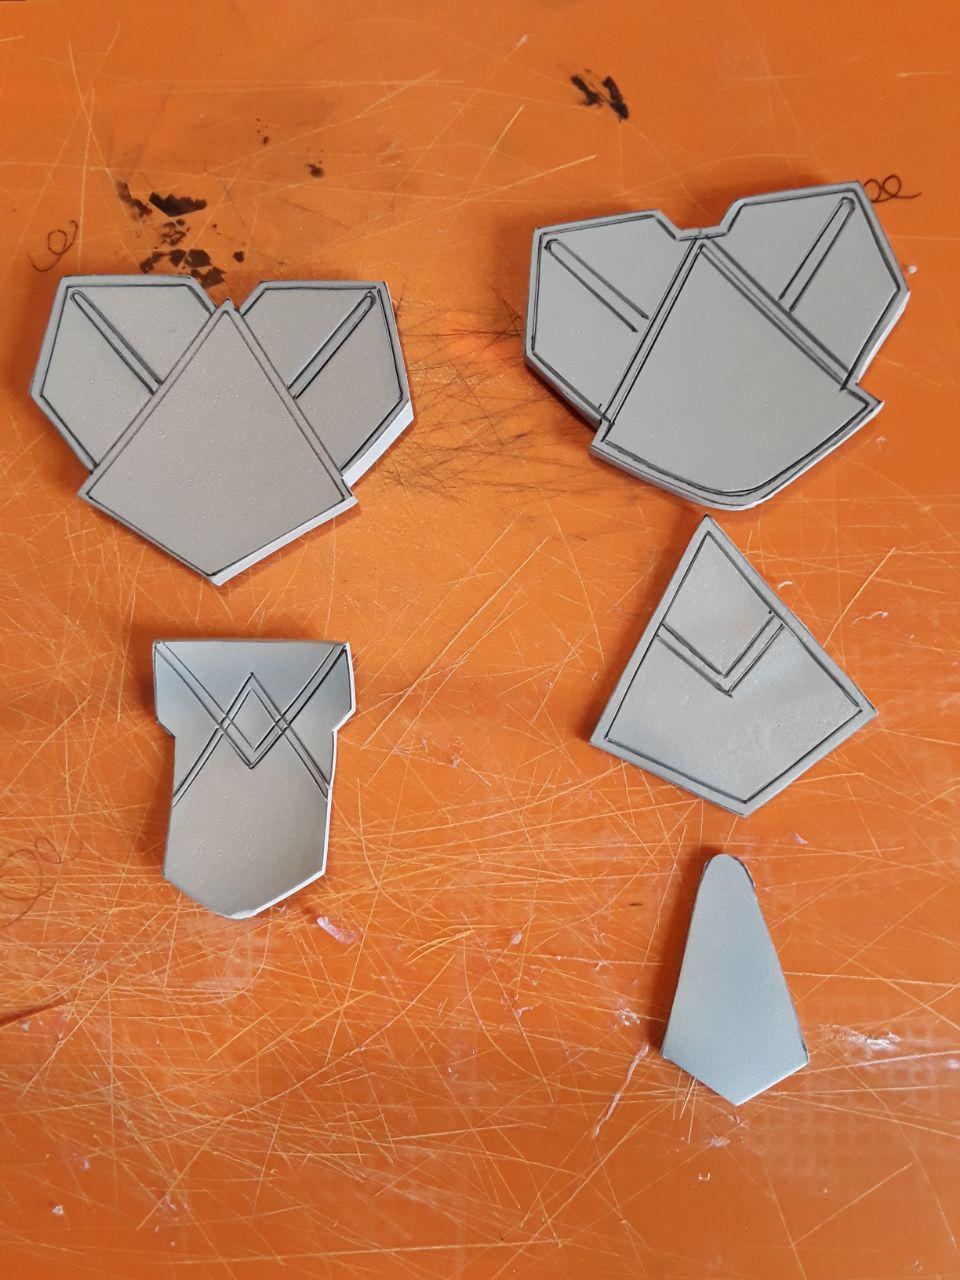
When lying all pieces on the floor, they look kind of wierd. All of them are made of 2mm foam, heat-sealed and painted afterwards. I had to mix several Vallejo airbrush colors to get the exact shade of red.
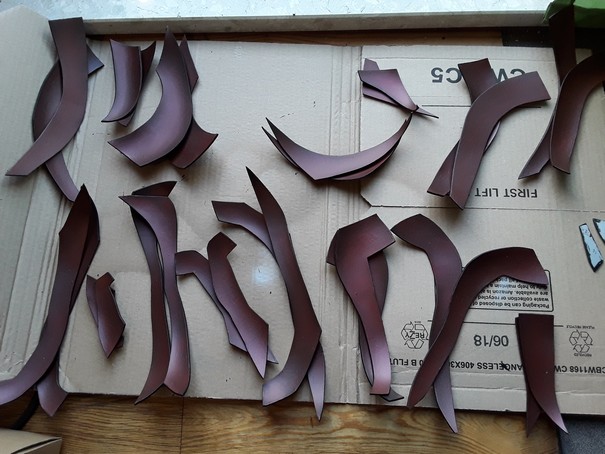
At the borders, I used tape to create a nice line.

Afterwards, all pieces were glued to the corset…
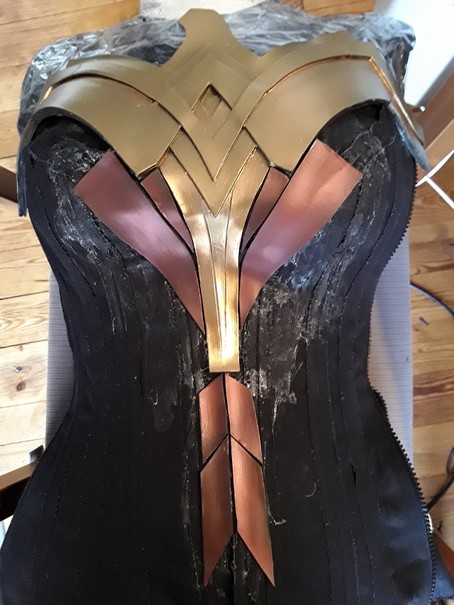
…until you could see what it was meant to be.

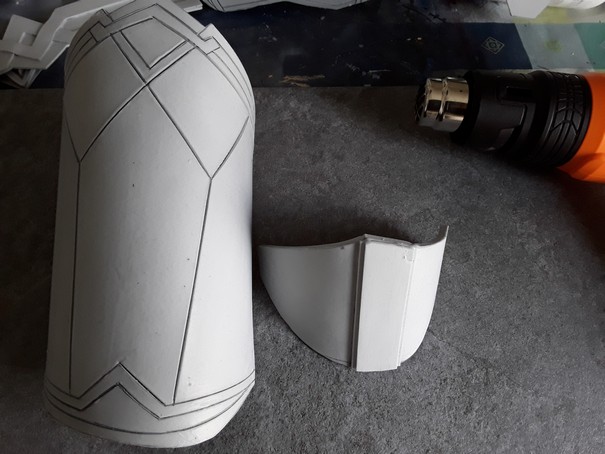
Other parts were less complicated, for example the bracers. I simply had to cut the lines into 5mm EVA foam. After heat-sealing, they were visible and created the desired shape.
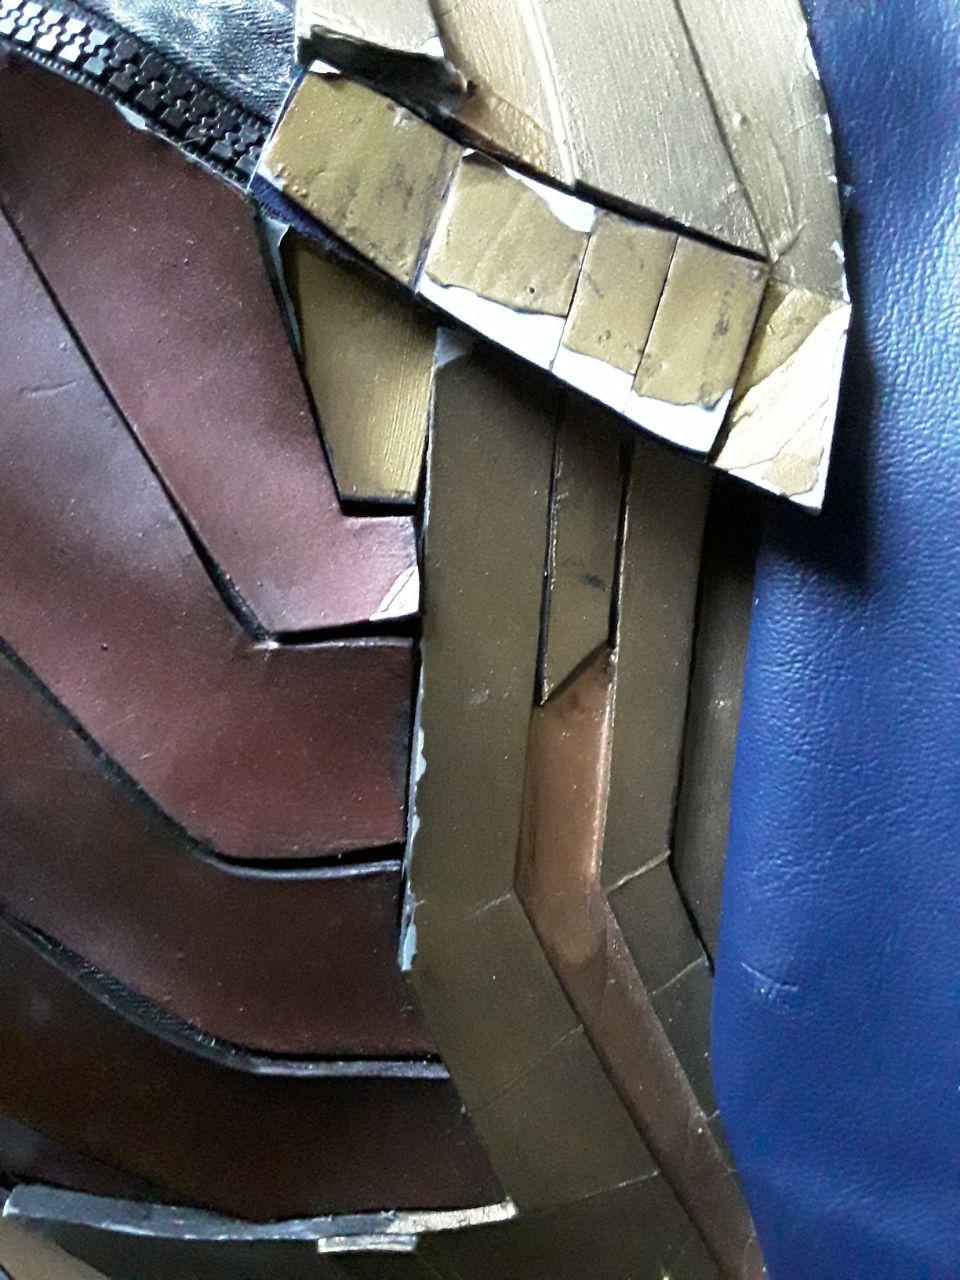
Some details were created by gluing different layers of foam to each other.
Others were made of Worbla.
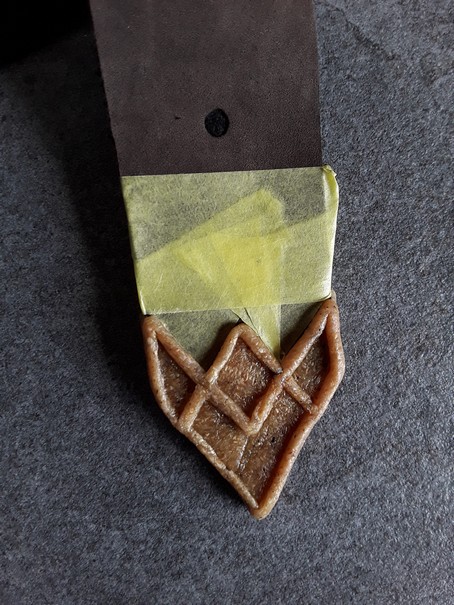
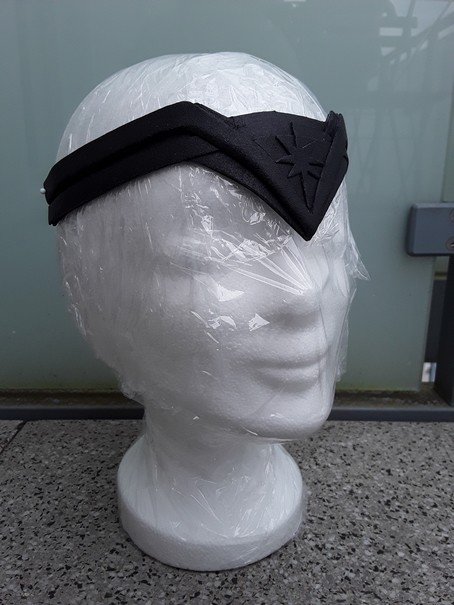
Above, you can see the brown Worbla Finest Arts. In contrast to this, the tiara was made of Black Worbla. However, I prefer the original one.
The shoes were more complicated. As a base. I buyed some ugly green high-heels and painted them golden.

Unfortunately, this was no perfmanent solution. The material of the shoe itself did fall apart on the day of the photoshooting. No way they had survived a whole day of walking at a convention. As a result, I made a second pair by using my the old pieces and glueing them onto more comfy boots.
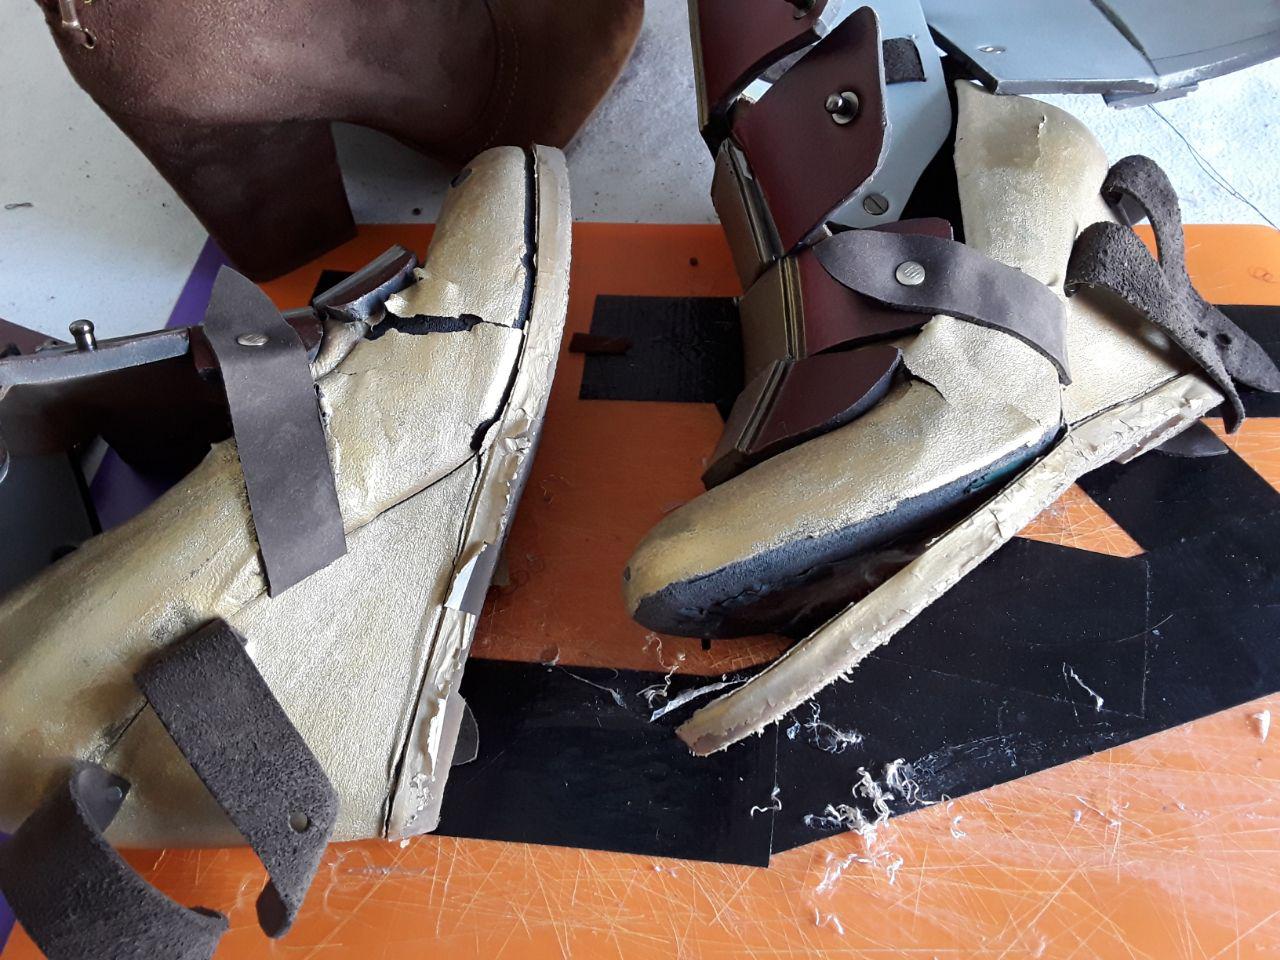
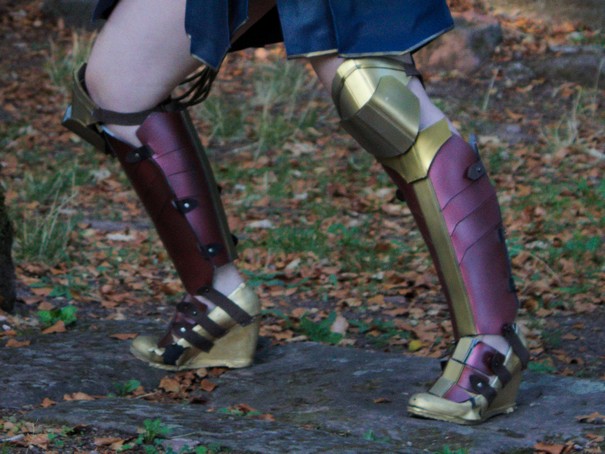
The other parts of the leg armour could not be seen in the movie in detail, so I had to work with exhibition photos and bad quality stills.
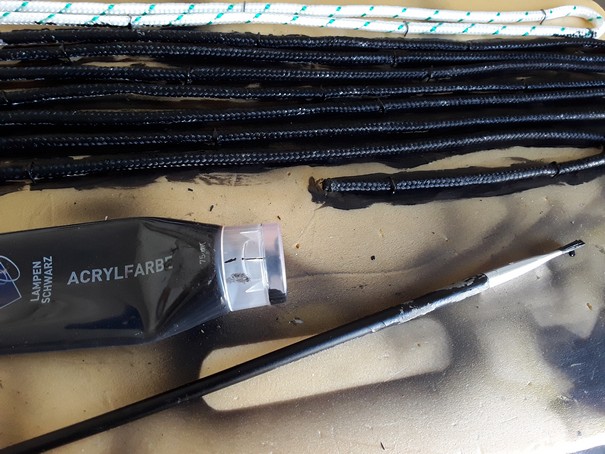
As I already guessed, I could not find any golden cord for the lasso, so I had to brush on some paint and a black foundation layer.
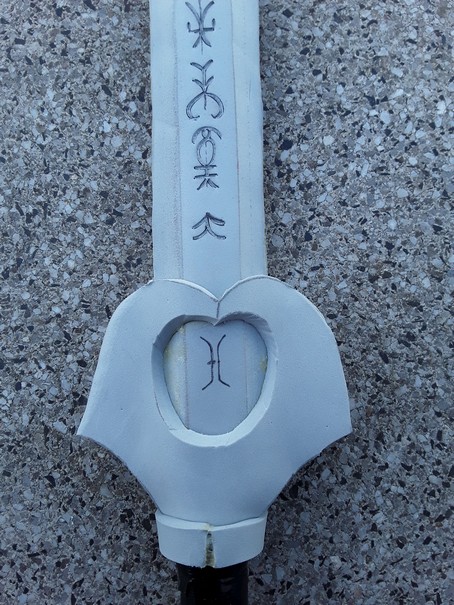
To sum it up, the sword’s front is made of foam while the back consists of Worbla. The devoration on the blade were carved into the foam. In contrast, the round shapes were created by using a wood burning tool. To make the sword more durable, I added some wood in the centre.
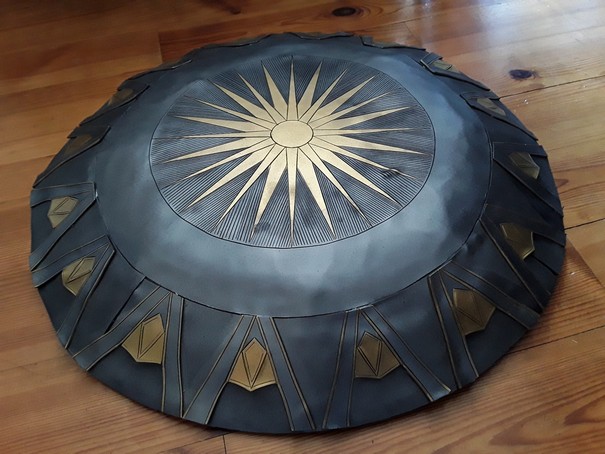
The shield was made of strong cardboard and covered in foam. Therefore, it is very lightweight. I achieved the pattern by carving and painting. The inner side is lined with fabric. Two leather strips were added for wearing the shield.
Unfortunately, some other photos were lost due to a malfunction of my smartphone. If you would like to know more details, write me an E-Mail.

Update: I had to fix some spots after the first convention. In most cases, the damage is not that bad.
Back to the cosplay’s main page
Back to the making-of section
Further construction hints for making the cloak (in German)